“This post is made possible by Cricut. They sent me the Easy Press 2 in exchange for sharing about it. All opinions are my own. This post contains affiliate links”
The Christmas season is upon us and that means trying to come up with something unique to give to your child’s teacher.
It’s a struggle for me each year because I appreciate so much all the work they put into teaching my child. And they put up with them all day long so they deserve the best I can afford, right?
This year I decided to use my Cricut Explore Air Cutting Machine and cut out some iron on vinyl.
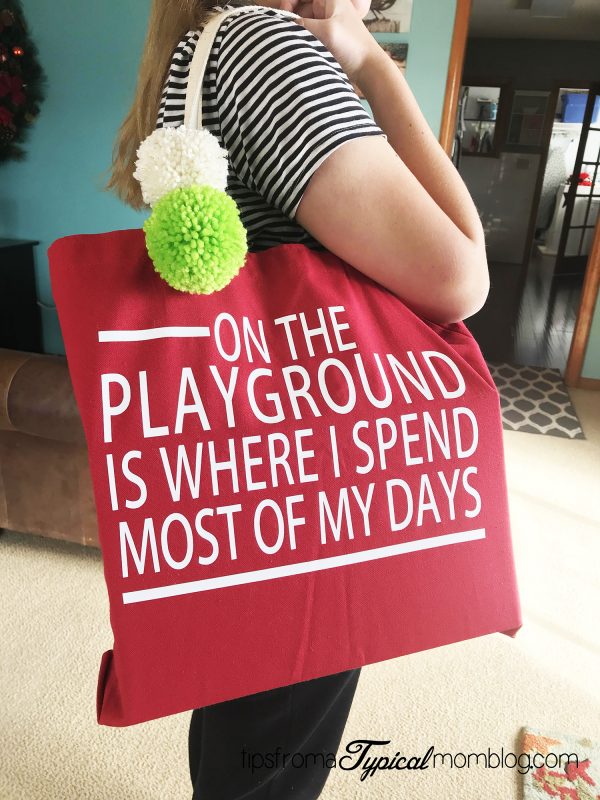
I found some super cute tote bags at Joann’s Fabric Store then found some cute ideas online that I wanted to cut out for the bags. I did this project with my Sister in Law and together we made 4 bags. My elementary aged son has two teachers because he is in a Chinese Immersion class. He has an English speaking teacher and a Chinese speaking teacher.
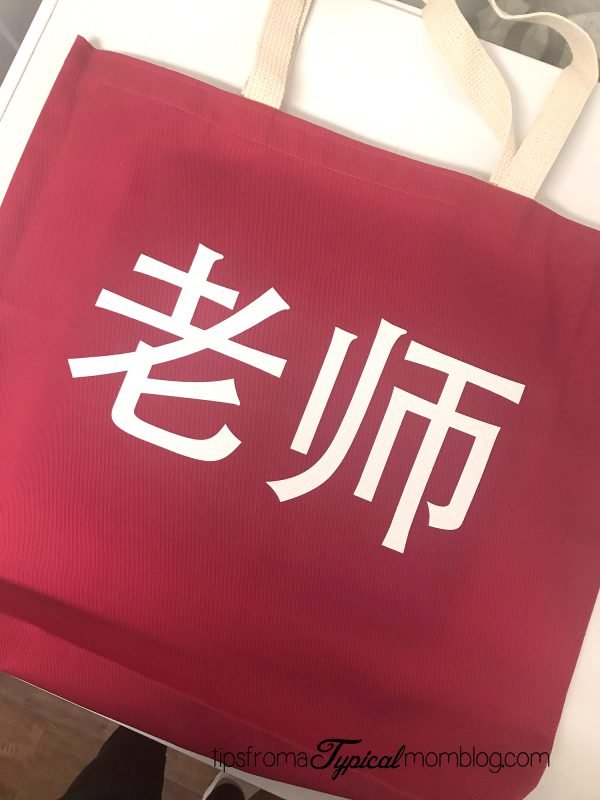
We made a tote bag for his Chinese teacher with the Chinese characters for “Teacher” on her bag and we made a bag with the saying “On the playground is where I spend most of my days” for his English teacher. Hopefully she’s not too young to understand the reference to “The Fresh Prince of Belle Air” Ha ha!

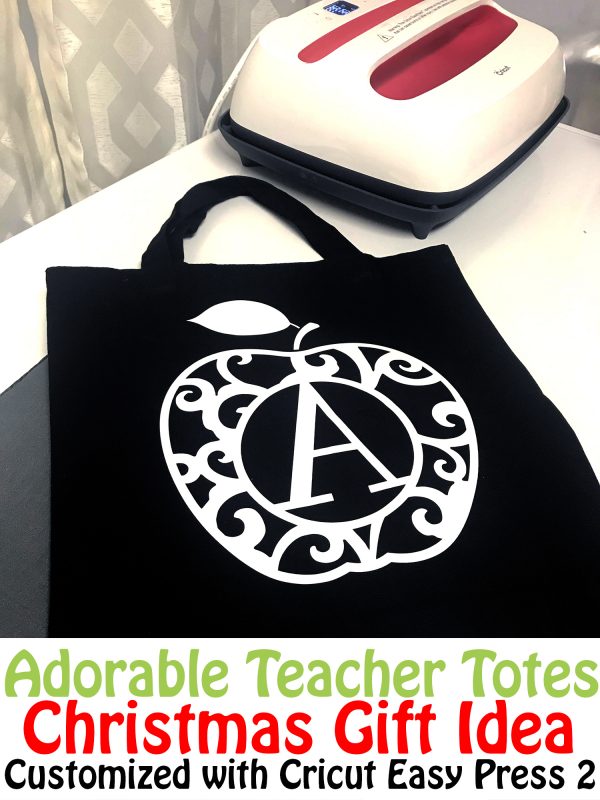
My Sister in Law did the cute saying for one of her daughters teachers and then a monogrammed apple with an A in it for her other daughters teacher. We found the cute apple cut file in this Etsy shop. I imported it into Photoshop and added the A but I’m sure you can do this in the Cricut Design Space too.
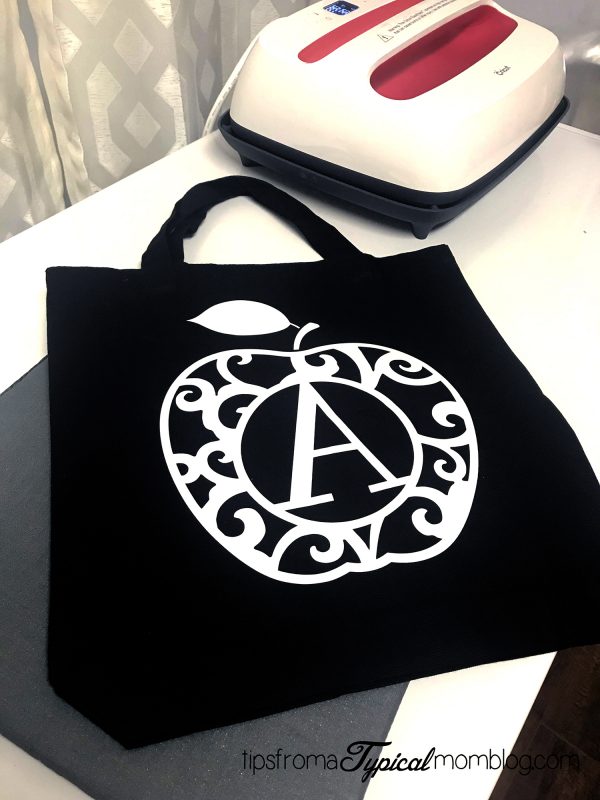
Now, if you are afraid of using iron on vinyl like I was, don’t be. It’s very simple. Especially with the new Cricut Easy Press 2.
The Easy Press 2 makes ironing on vinyl a cinch! Seriously. I used to make things all the time with my iron and I wasn’t sure if I was using the correct temperature, and honestly a lot of my projects didn’t last very long because I wasn’t doing it right. With the Easy Press 2 though, it was so simple. You set the temperature recommended for your project, you let it warm up, then you use the handy timer right on the press and hold it down on your project until it beeps and you’re done! Easy peasy!
There are a few things to remember when using Iron On Vinyl.
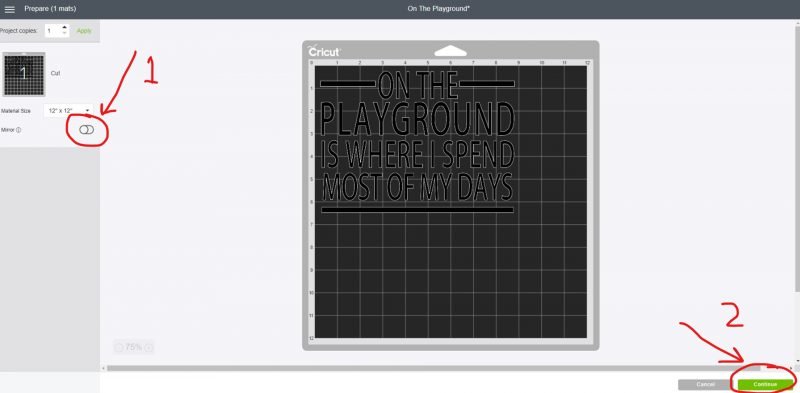
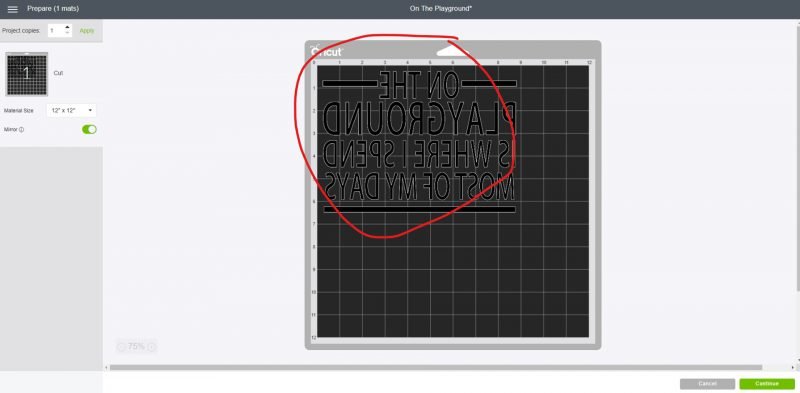
- Make sure you flip the image before you cut it out. The Cricut design space makes this really easy by having a little thing you can click to mirror the image right within the cutting screen on the computer.
- Measure what you are ironing on so you don’t create a cut that is too big for your project.
- Use the Easy Press 2 to warm up your project (shirt, bag, towel etc.) before you place the vinyl on it.
- Use even pressure while applying the Easy Press 2 to your project.
- Use the correct temperature for the type of material you are using. You can find this information HERE.
- Use the right size Easy Press 2 for the project you are doing. I have all three! You can choose from 12″x10″, 9″x9″, and a 6″x7″.
So now I’ll show you how I made these cute Tote Bags for my Son’s Teachers.
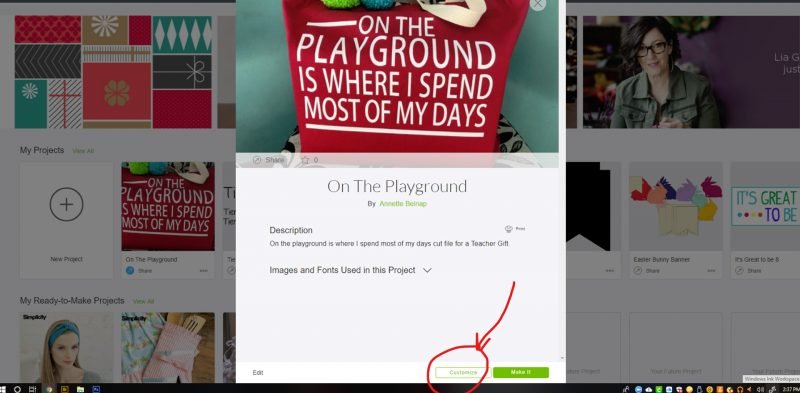
If you would like to make the saying about the playground, you can CLICK HERE and it will open the project up for you in Cricut Design Space.
1. Open the file in Cricut Design Space
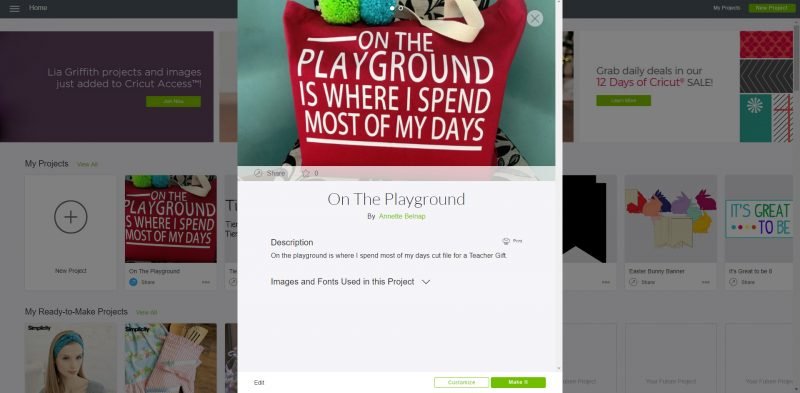
2. Click on “Make it” at the bottom of the screen
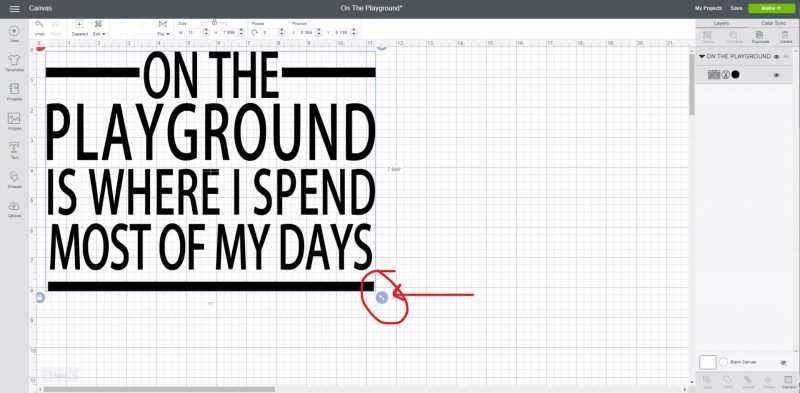
3. Slide the image to the size you need it to be cut. Then click the green Make It button in the top right hand corner.
4. Click the mirror image slider then click continue.
5. Be sure that the image was mirrored before clicking continue. If you forgot, just click Back.
6. Turn on your Cricut Machine and set the Material on the machine itself to Custom. Then click the Browse all Materials and find the right kind of vinyl you are using.

7. You can see here that I searched for Iron and found all these types of iron on vinyls to choose from.

8. Once you choose iron on, the software will remind you to click the mirror button. If you already have, just ignore that warning.

9. Place your vinyl SHINY SIDE UP onto your cutting mat and load it into your Cricut Machine and Press Go. Now watch as your cute saying gets cut. That’s my favorite part!
10. Weed the vinyl (that means remove all the excess vinyl around the words and design.) Make sure the shiny clear backing stays put.
11. Iron the material you will be putting the vinyl on to make sure there are no wrinkles.
12. Place the material on the Cricut Easy Press Mat on a flat heat resistant surface. I used my chest freezer top. (I like using these instead of my ironing board because there are no weird patterns that come through the mat like with my ironing board. My ironing board mat is thin and doesn’t work that great)

13. Turn on your Easy Press 2 and set the desired temperature and time. Use this guide to help you figure out the correct temperature and time.
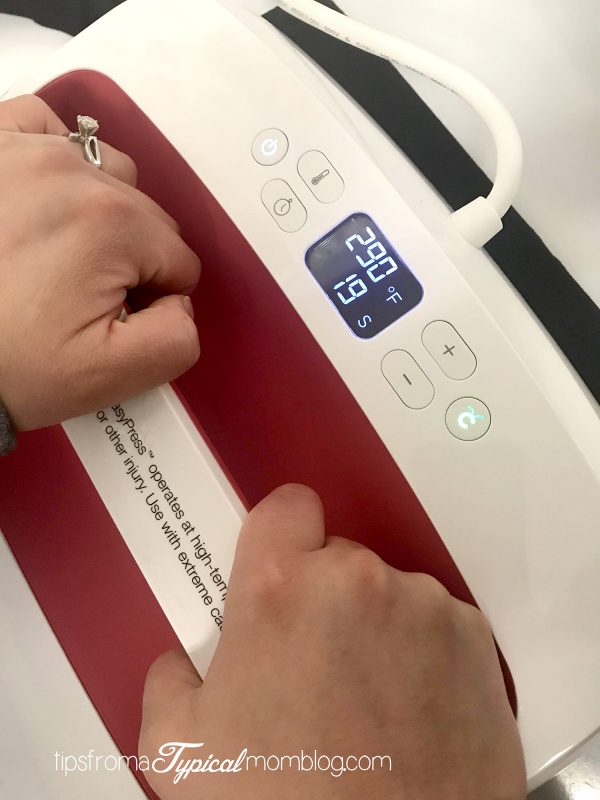
14. Once the Easy Press 2 is hot, apply it to the surface of your material for about 5 seconds to warm it up. This will help the vinyl stick better.
15. Place the vinyl where desired and put a thin fabric or thin towel (I use a tea towel) over the vinyl then place the Easy Press 2 on top, square over the vinyl, and press down. Hit the button to start the timer and continue to press down until the timer is over.
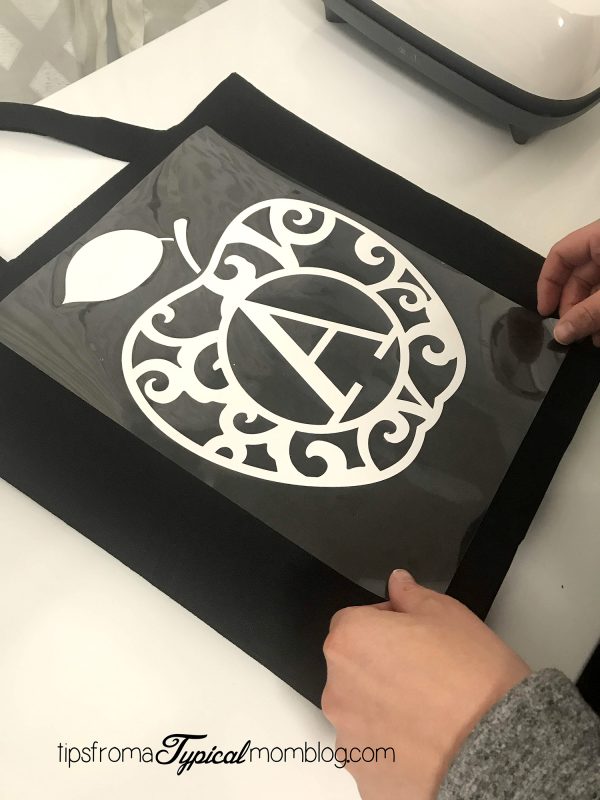
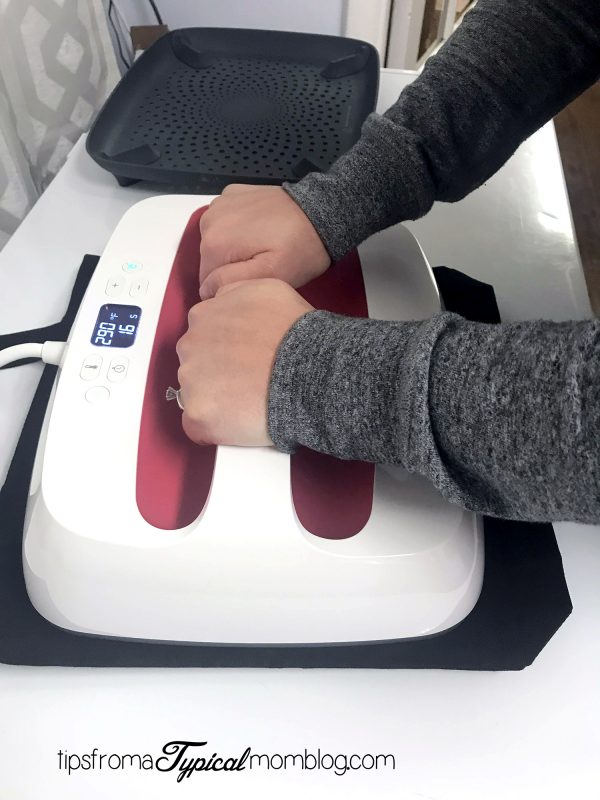
16. Flip the material over and press on the back for 15 seconds.
17. Remove the shiny clear film while everything is still warm and you’re done!
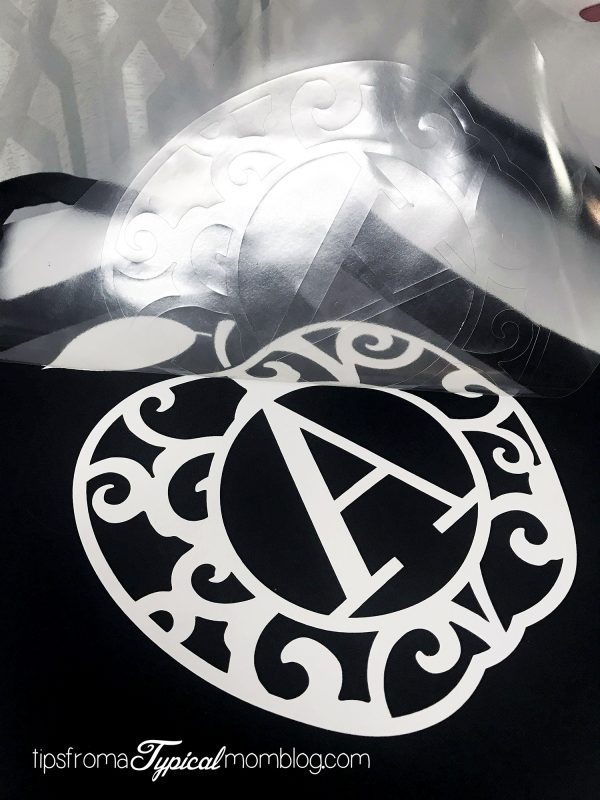
It’s so easy and such a great gift. Everyone loves a personalized gift, right?
I went a step further and made these cute Pom Pom’s to go on the bag. I left the strings long so she could untie them and use them for something else if she wanted. We used THESE pom pom makers so they looked more professional. And let me tell you, these make making pom poms so easy!

Well, what do you think? You want an Easy Press 2 now don’t you? I knew you did. Head over to their Amazon shop and treat yourself. You will be surprised at how much you use them. Every party, every event, every birthday, every wedding, every school party. You’ll love your Cricut Cutting Machine and Easy Press 2.


[…] CUSTOMIZED TEACHER TOTE BAG From Tips From A Typical Mom <<< Great way to carry homework home for marking! […]