“This post was made possible by Cricut. Thank you for supplying me the materials to make this fun project. This post contains affiliate links. Learn more here.”
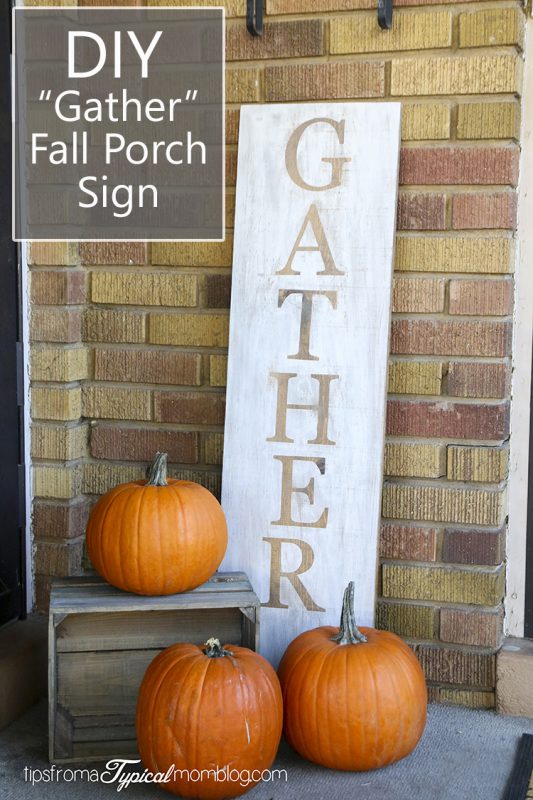
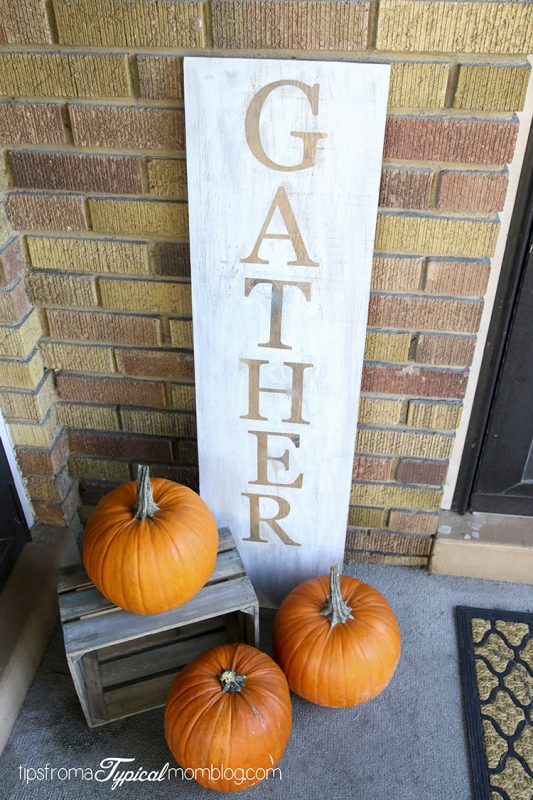
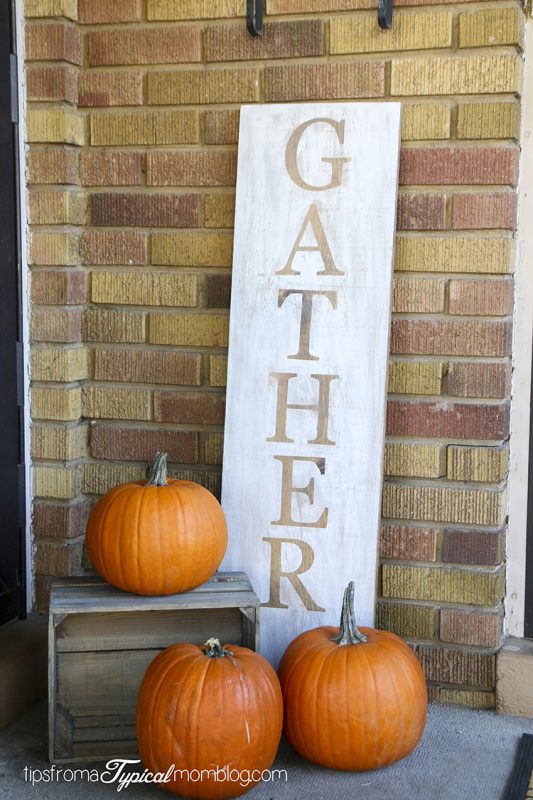
I love decorating for Autumn. I love the oranges, reds, yellows, purples, and browns. And now that we’ve moved into an older home, with a cute little porch, I’m super excited to decorate the porch for Fall. I got together with one of my friends and we made this cute “Gather” Fall Porch Wood Sign. It was so easy to make with the help of my Cricut Explore Air Machine. So today I’m going to show you how we made this adorable porch sign.
We had a hard time deciding what word we wanted to use for our sign. We were deciding between Harvest, Gather, Fall, and Autumn. We settled on Gather because it’s a perfect word for the Autumn Season. We gather our harvest, we gather candy on Halloween, and we gather friends and family on Thanksgiving. I’m going to make my sign double sided with the word “Believe” on the other side with a crimson stain under the white for Christmas. I’m excited for that and will share that with you when it’s completed. With 5 kids at home, we only had time to do one side for now.
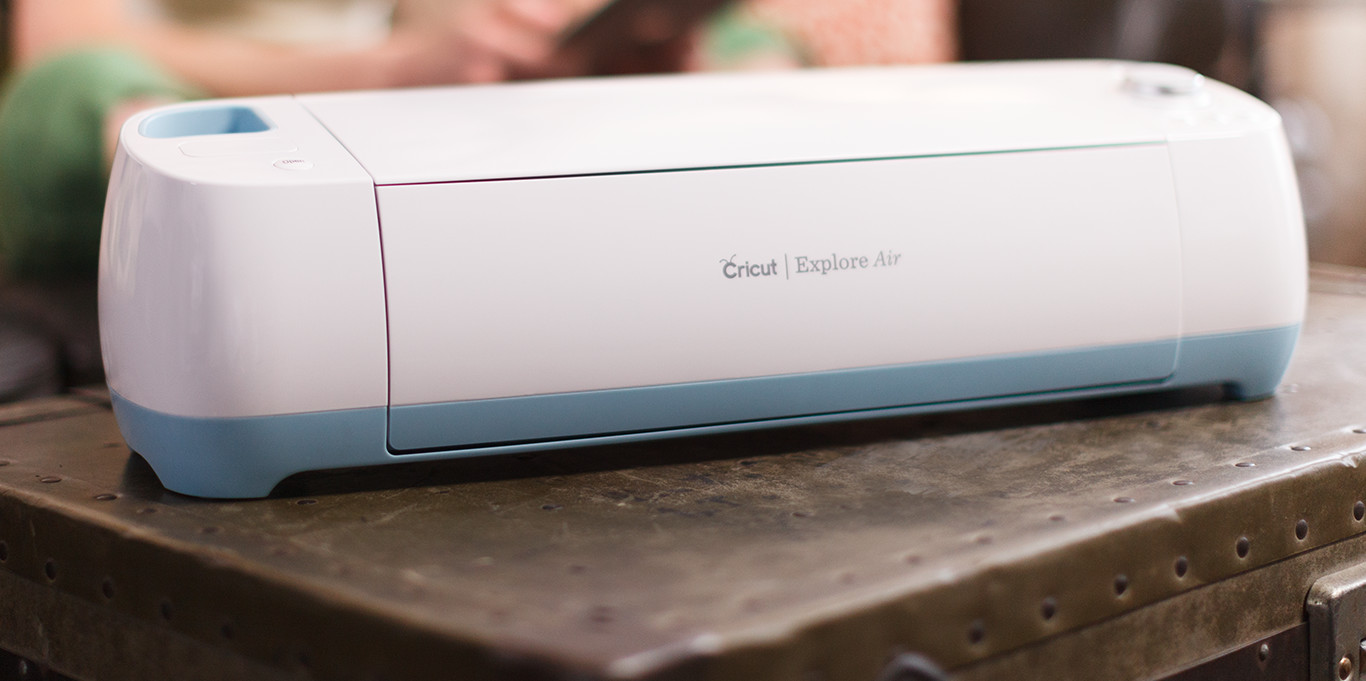
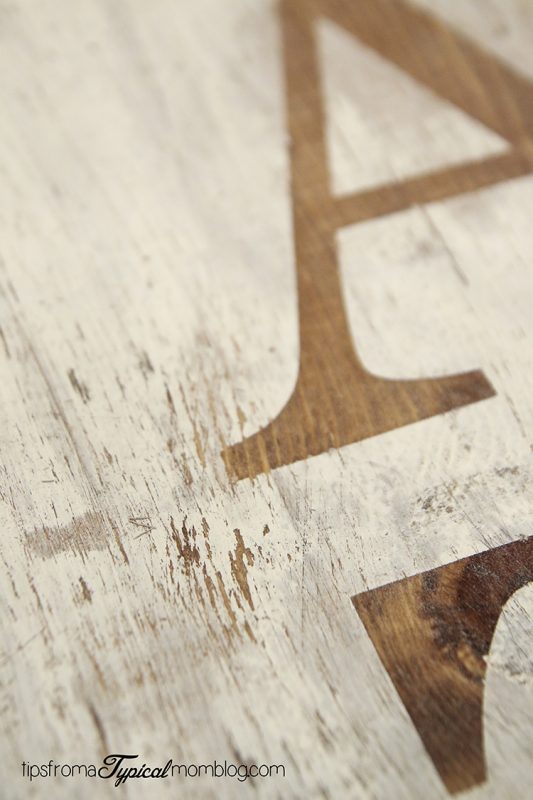
So let’s get started. I love how this sign is created like a negative. With the wood showing through for the letters and a white wash on the rest of the board. To do this we made our letters out of scrap vinyl with my Cricut machine. I love this machine so much! I use it to cut out all my creations. From t-shirt designs to gift tags. It can cut almost anything.
Supplies needed:
- Scrap Vinyl: About two 12 x 12 pieces.
- Transfer Tape
- A Cricut Machine or other machine that can cut vinyl (the letters can be cut by hand also if you don’t have a machine)
- Scissors
- Dark wood stain
- White acrylic paint
- Pounce Sponge Brush
- Regular paint brush
- Sand paper
- Paper towels
- Ruler or tape measure
First, I measured my board. Mine measures 11.5″ x 40″. So we decided how tall and wide our letters needed to be to fit and created them in the Cricut Design Space. I wanted to leave some space at the bottom of the sign because I knew I wanted to put pumpkins around the bottom of the sign while it was on my porch. So I left about 6 inches on the bottom. We used scrap vinyl to cut out our letters to use as a stencil for our Gather Sign. Here is a quick tutorial on how we made our letters with my Cricut Explore Air.
While my letters are cutting, I sand and stain the board with a pretty dark stain. I used a dark walnut stain. Make sure you use just a stain and not one with a polyurethane finish. That will make it hard for the paint to stick. I always wear gloves for this part of the project and use paper towels to apply and wipe off excess stain.
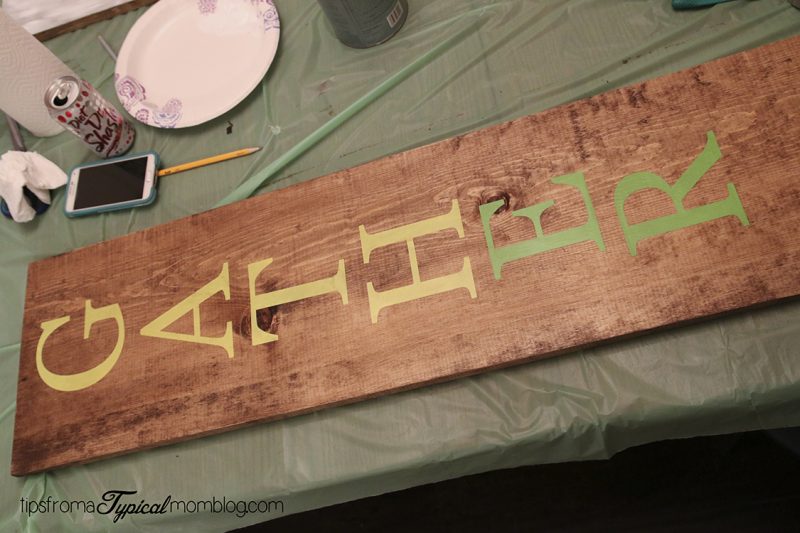
Once our letters are cut out, I cut them apart, removed the excess vinyl around the letters, and started measuring to make sure they were spaced evenly on the board. Mine fit with about 3 inches on each side. I spaced my letters about an inch apart from one another. You can figure this out yourself for your own size board. In the picture below it shows my letters horizontal, you can choose to do vertical or horizontal. It just depends on where you are planning on displaying your cute sign.
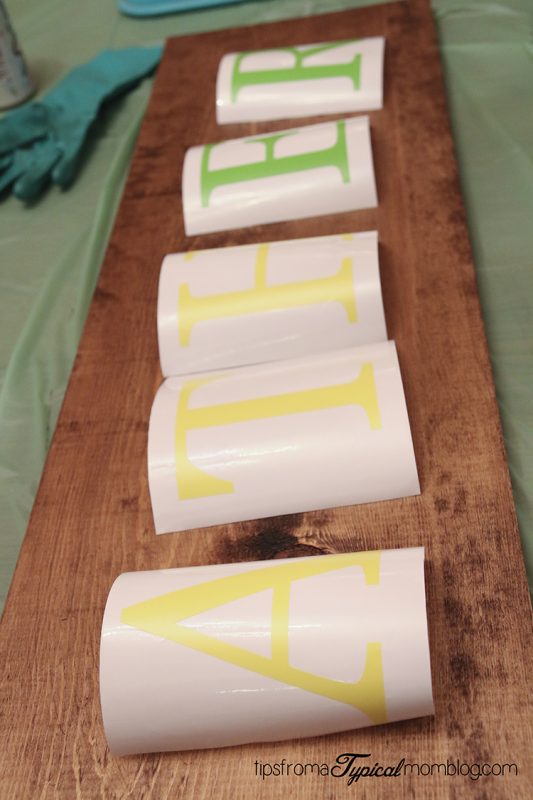
I used the Cricut transfer tape to transfer my letters onto my board. I love this tape! I used one square for all my letters. You can use it over and over again until the stickiness wears off.

Once our letters are placed on the board, I go over them with a dish scraper or a ruler to push them onto the board so there are no bubbles. We don’t want paint seeping under any part of our letters.
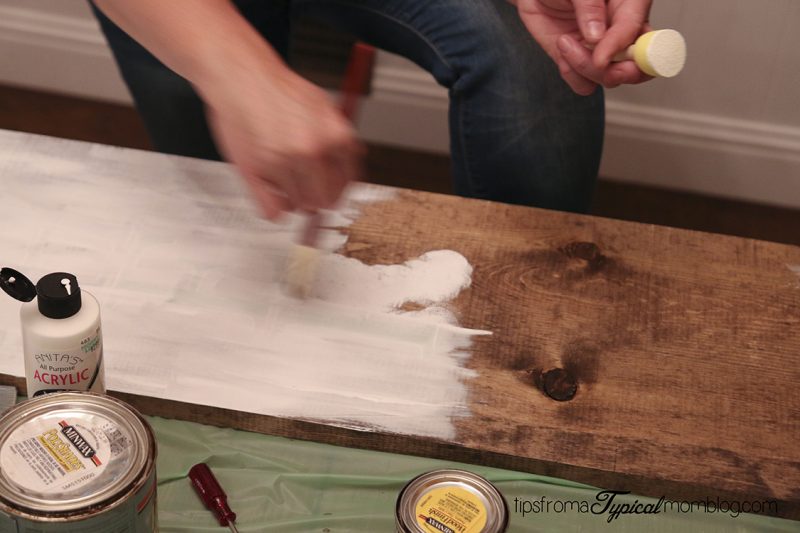
Sand your board around the letters to help the white paint stick better.
Now use the pounce sponge brush to pounce the paint around your letters. I use a stencil brush for this because there is a lesser chance of paint seeping under the vinyl. Once I have pounced around a letter I let it dry slightly then use the other paint brush to smooth it out and paint over the rest of the board.
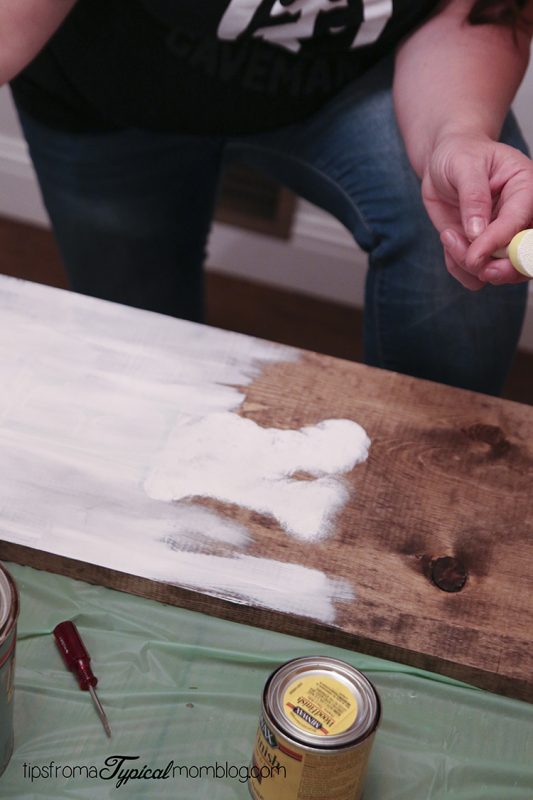
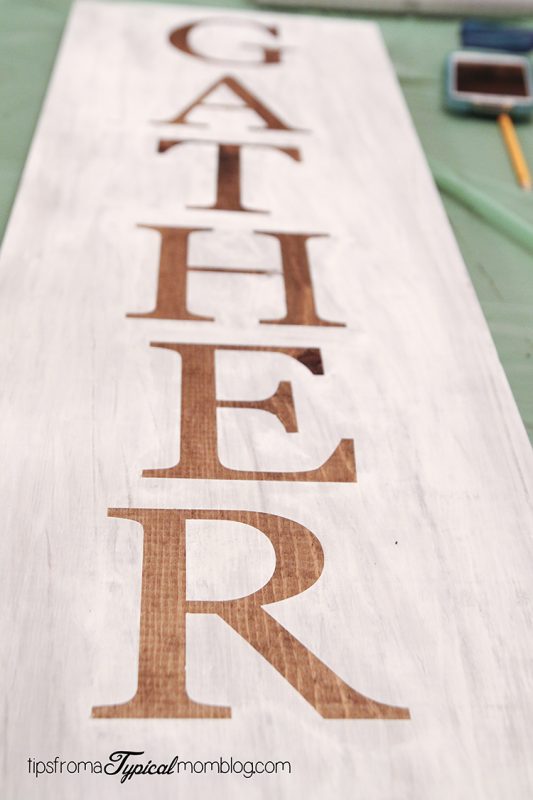
Add a few layers of white paint to the whole face of the board until you like the way it looks. I did fewer layers because I wanted a white washed look on my board. I didn’t paint the sides of the board because I wanted them to just stay stained.
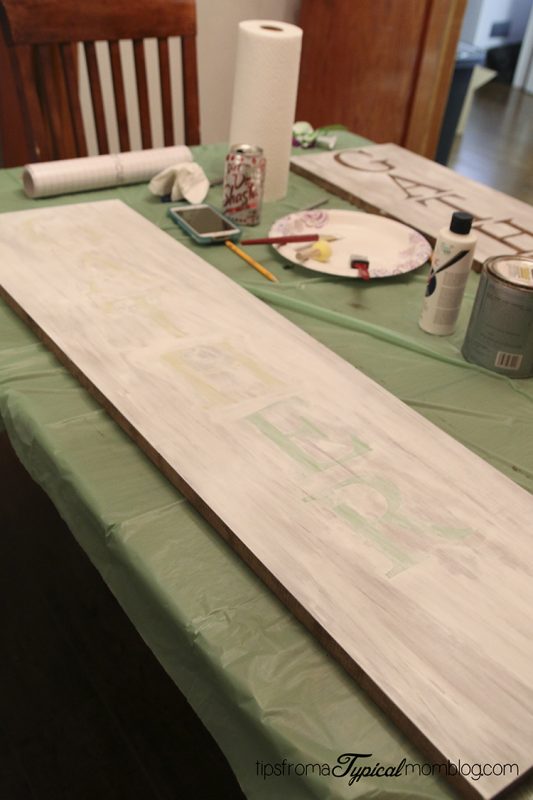
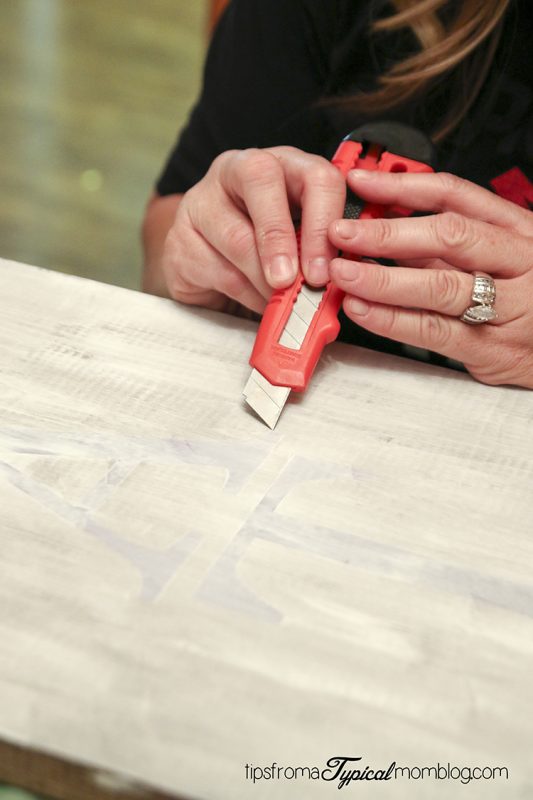
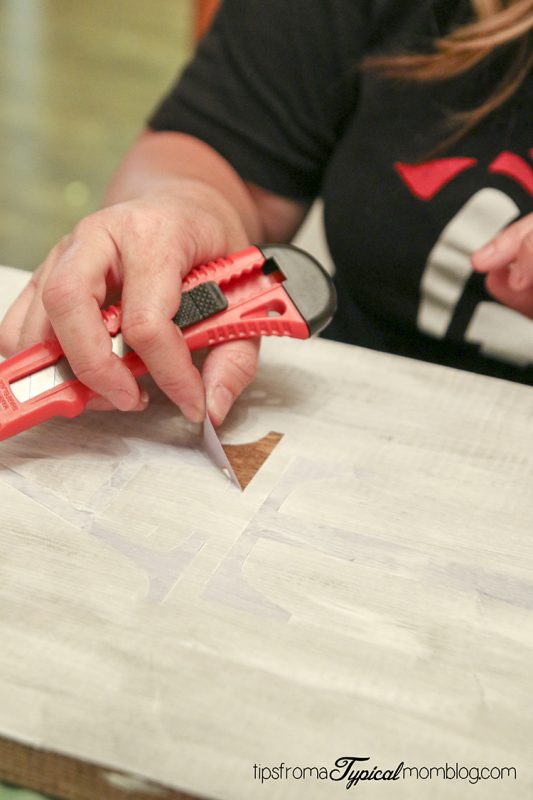
When the paint is almost dry, pull off your vinyl letters. Use a box cutter or knife to help you pull up the edges of the vinyl.
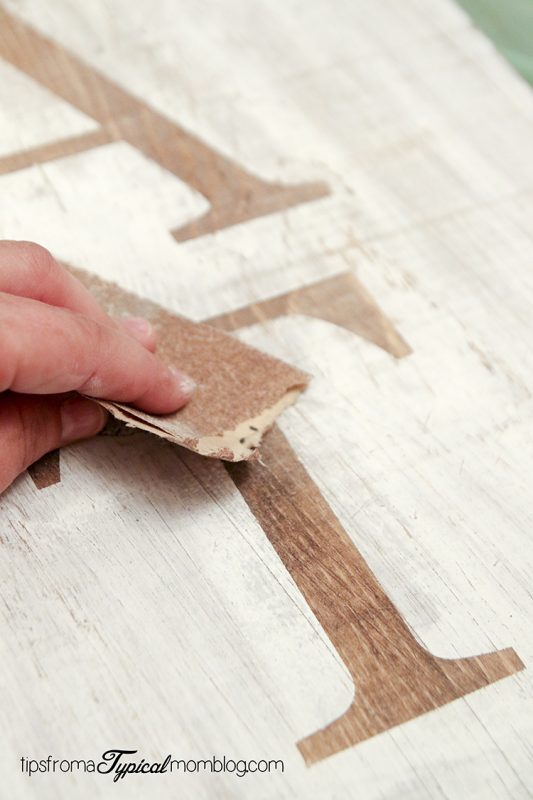
Let the paint dry completely then sand around the edges of the board and on the face of the board until you get the desired distressed look you are going for.
You are done! Wasn’t that easy peasy!? I love this project so much! Look at how cut it looks on my porch.
If you make a cute sign, please send me a picture of it! I’d love to see it. Have a great Fall y’all!


I love signs like this. It’s cute how you decorated around it with the pumpkins too. Thanks for sharing, great ideas!
The DIY fall porch wood sign featured in this article is a charming and creative way to welcome the autumn season. For those looking to enhance their outdoor decor further, consider exploring signage and wraps at https://kbmediacorp.ca/signage-wraps/ for customizable options to elevate your fall aesthetic even more!