Tips from a Typical Mom

Family, Food & Fun!

  • Recipes
    • Dinner
    • Soup
    • Salad
    • Bread
    • Appetizers
    • Beverages
    • Cakes
    • Cupcakes
    • Brownies
    • Desserts and Treats
    • Instant Pot
  • Parenting
    • Parenting Articles
    • Babies
    • Toddlers
    • Preschool
    • Teens
  • Holidays
    • New Years
    • Valentines Day
    • Saint Patrick’s Day
    • Spring
    • Easter
    • Mothers Day
    • Fathers Day
    • Summer
    • 4th of July
    • Fall
    • Back To School
    • Halloween
    • Thanksgiving
    • Winter
    • Christmas
  • Cleaning
    • Cleaning Tips
    • Organize
  • Travel
  • Personal Care
  • About
  • Favorite Products

Halloween Crystal Balls DIY Decor

09/24/14 | Crafts, Halloween, Holidays, Home Decor, Homemade, How To, Uncategorized

“This post contains affiliate links.”

I’ll admit that Halloween is not one of my favorite holidays. I don’t like all the spooky stuff. I never have. BUT I do really like decorating for it. I don’t like really spooky looking things in my home though. I have young kids that are really sensitive to those things. That’s why these cute Not So Spooky Halloween Crystal Balls are perfect for a  home with small kids.

Not So Spooky Halloween Crystal Balls Craft Decoration

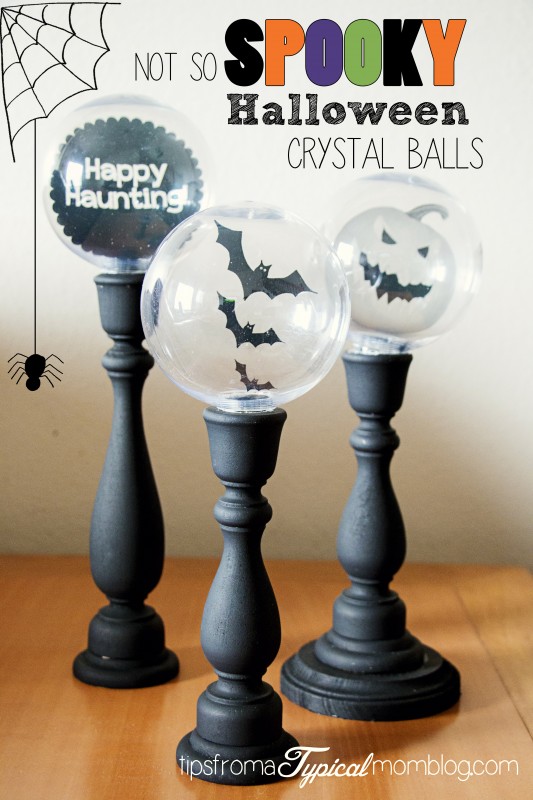
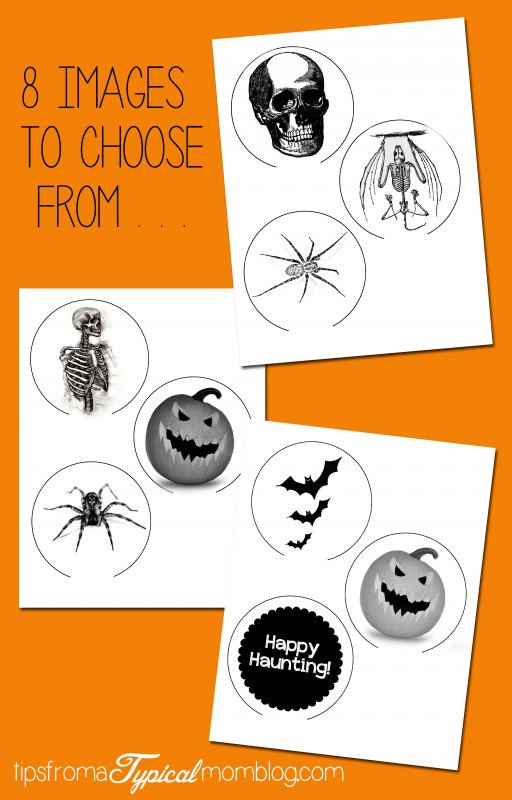
When I saw THESE, I though they were adorable, but I wanted a less scary version. So I made these and wanted to share the printables with you.

Here’s what you’ll need:

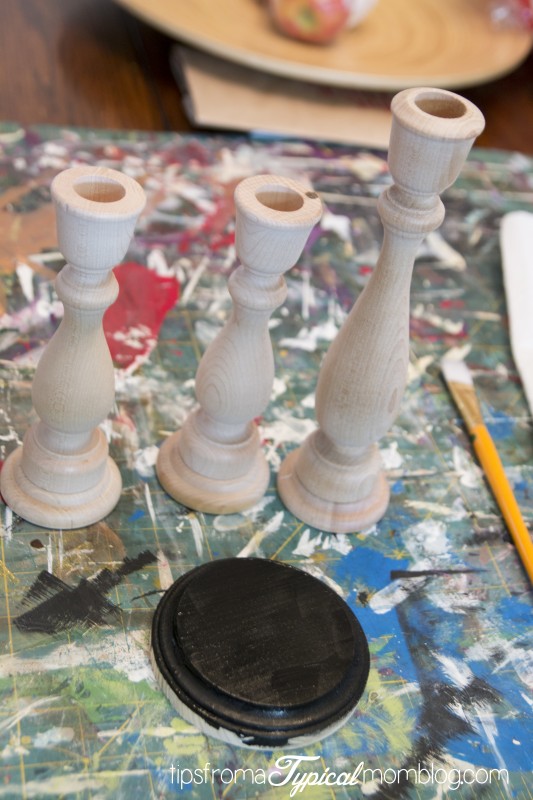
  • 3 candlesticks three different heights, 9-Inch Wooden Candlestick, 6-3/4-Inch Wooden Candlestick
  • black paint and paintbrush
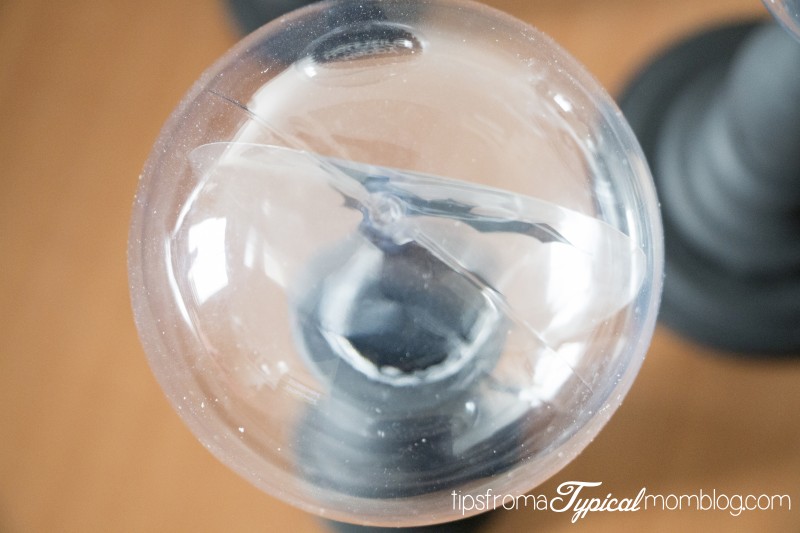
  • 3- 4″ clear plastic Christmas balls (I got mine at Michaels)
  • E6000® Craft Adhesive or hot glue
  • printables printed on clear projector paper (We emailed them to Office Max and had them print them on projector paper)

Start out by finding three candlesticks. I found mine at a local wood store. They only had two sizes, so I bought a little wooden coaster to make one of the small ones a medium height.

DIY Not So Spooky Halloween Crystal Ball candlesticks

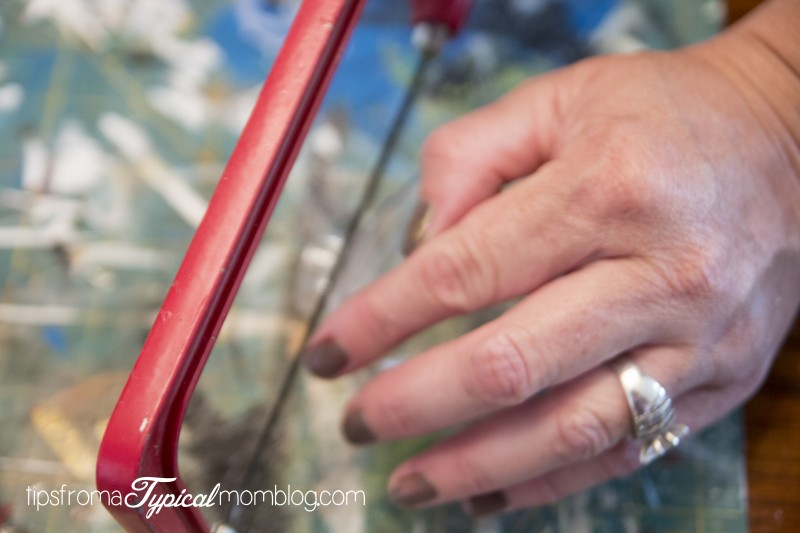
Paint your candlesticks black. Make sure to paint the inside where the candle goes. Then cut off the bottom of the plastic Christmas ball (if it doesn’t fit inside the top of your candlestick) with a hacksaw or something else with a find blade. Now all the dust from sawing will go inside, so use a blow dryer to try and blow it out of there, then us a wadded up paper towel to try to wipe out the rest. I skipped this step and wish I hadn’t. I’m so lazy!

DIY Not So Spooky Halloween Crystal Ball candlesticks

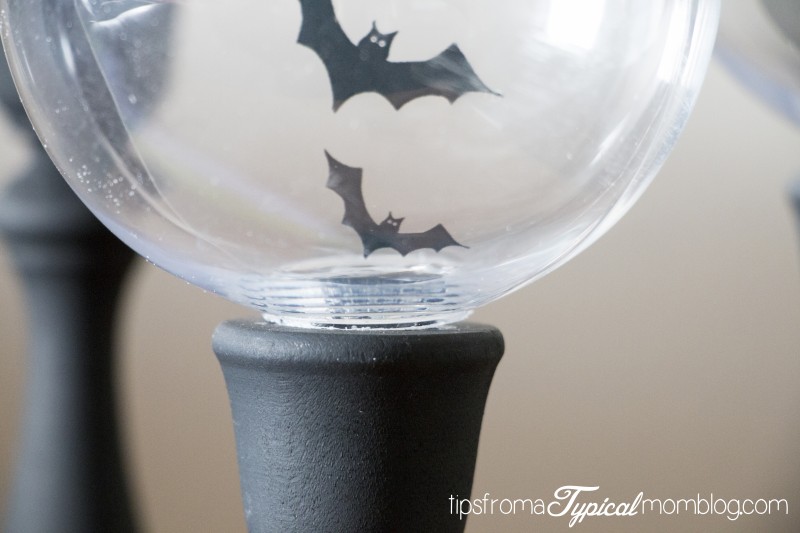
Cut the printables inside the circle leaving a tab at the bottom where the circle breaks. This is where you’ll be holding onto the printable to manipulate it while it’s inside the bulb. If the circle is too bog and doesn’t lay flat inside the bulb, cut off a little by little until it fits perfectly.

Now glue the bulbs onto the top of the candlesticks. I used E6000 because it dries so clear.

DIY Not So Spooky Halloween Crystal Ball candlesticks

You’re done! Simple right? Mine is a little too dusty inside, but I’m a lazy crafter. Oops!

DIY Not So Spooky Halloween Crystal Ball candlesticks

DIY Not So Spooky Halloween Crystal Ball candlesticks

DIY Not So Spooky Halloween Crystal Ball candlesticks

Click on the picture to download the printables or CLICK HERE. I’ve added a few extra ones for those of you who do like spooky ones. The ones I made are just more kid friendly 😉

8 images to choose from Halloween Crystal Ball Candle Sticks


Related

Comments | 8 comments

« Chocolate, Banana & Peanut Butter Iced Protein Shake + Blendtec Giveaway!
Pumpkin Filled Sweet Fruit Chimichangas »

Comments

  1. Taralyn says

    September 24, 2014 at 5:44 pm

    These are so fun! Thanks for the printables!

    Reply
  2. Vidya Sudarsan says

    September 24, 2014 at 6:47 pm

    Perfect for Halloween 🙂 very cute!

    Reply
  3. Renee@ Two in the Kitchen says

    September 24, 2014 at 11:15 pm

    Oh wow! I love this idea for Halloween Annette! I am sharing on my personal FB page!! 🙂

    Reply
    • tipsfromamom says

      September 25, 2014 at 7:23 pm

      Thanks Renee~!

      Reply
  4. Luna says

    September 21, 2016 at 11:04 pm

    How and where did you glue the tab of the insert after you cut off the bottom of the ornament with the hacksaw?
    Thanks!

    Reply
    • tipsfromamom says

      September 26, 2016 at 8:48 am

      I just glued the tab to the bottom of the ornament to hold it in place.

      Reply
  5. Diane says

    October 9, 2017 at 6:22 am

    Hi. I love these crystal balls. How do I get the printables? Thanks Diane

    Reply

Trackbacks

  1. 8+ Innovative Ideas for Halloween Table Decorations | Games and Celebrations says:
    June 28, 2017 at 7:41 am

    […] a gothic décor, you can put crystal balls, napkins with horrifying prints, and tall candlesticks. It would be like dining at a planchet table […]

    Reply

Leave a Reply to tipsfromamom Cancel reply

Your email address will not be published. Required fields are marked *

Follow me on social media

  • Facebook
  • Instagram
  • LinkedIn
  • Pinterest
  • Twitter
  • YouTube

Search this site

Feminine Needs Delivered Monthly. Starting at $1.

Mexican Street Corn Salad- Family Friendly Side Dish

Easy Zesty Italian Pasta Sala

Easy Zesty Italian Pasta Salad Recipe

Connect with me

  • Facebook
  • Instagram
  • LinkedIn
  • Pinterest
  • Twitter
  • YouTube

Categories

Archives

Copyright © 2025 · Tasteful theme by Restored 316

Copyright © 2025 · Tasteful Theme on Genesis Framework · WordPress · Log in


Loading Comments...