“This post contains affiliate links. Please ready my disclosure document for more information.”

I know you’ve had that time when your kid has come home from school and said, “MOM! I need a recipe of Salt Dough to bring to school tomorrow, how do I make salt dough?!” Ugh. I never have enough salt and I hate making it because the salt makes my hands feel all dry and itchy. That is when I decided there had to be a better way! I found this recipe and I feel in love. It’s more like clay and it makes your hands feel like silk! This recipe is MUCH better than salt dough. Try it out and have some fun!
How to make homemade clay, better than salt dough . . .
Better Than Salt Dough, Homemade Clay
- 1/2 cup cornstarch
- 1 cup baking soda
- 3/4 cup water
- cookie cutters
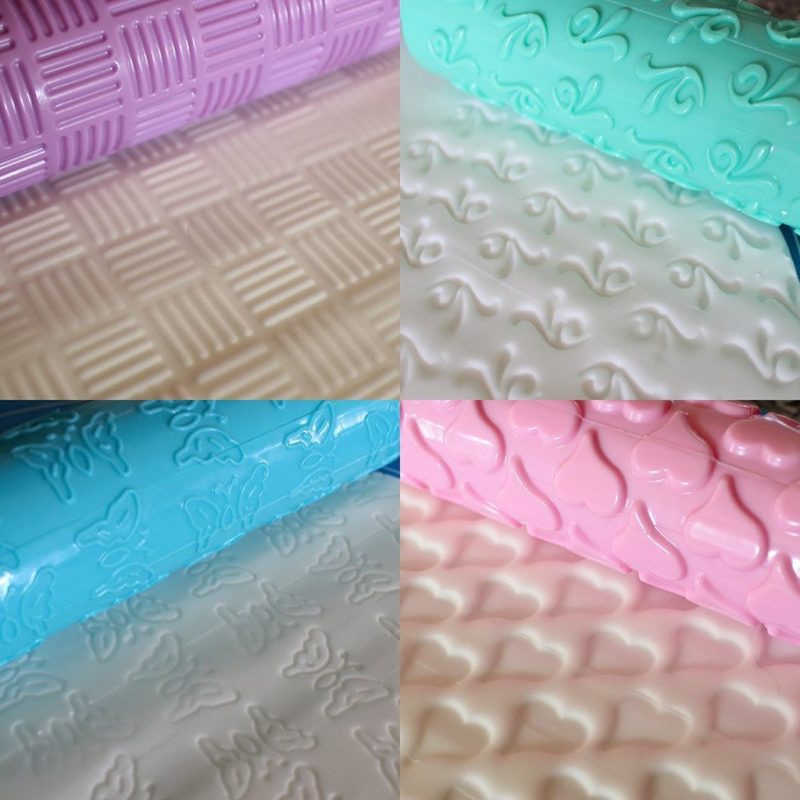
- for fun: embossed rolling pins and craft paint
- optional: food coloring (if you want to make colored dough, add the food coloring to the water before you mix it in.)

Making Clay
In a medium sized pot combine the cornstarch, baking soda, and water. Stir over medium heat. After a couple of minutes, the mixture will begin to thicken. When it looks like smooth, mashed potatoes, remove the pot from the heat. Spoon the ball of dough into a bowl and cover it with a damp cloth or plastic wrap until it’s cool. When it’s cool, knead it on a smooth surface (I use my silicone mat for this. I use this mat about 3 times a week while baking.) until smooth and silky. Add more cornstarch if it feels too sticky and/or sticks to the surface.

*You can let the ornaments air dry over night in a warm place or you can bake them. If you think that you might live in a very dry place or low elevation, PLEASE air dry your clay with a plastic bag loosely over the top to help prevent cracking like this:
**If your clay cracks while drying, just fill in those cracks with more clay, cover loosely with a plastic bag and let it dry on it’s own. This may take a few days but it will work.
To bake them:
Preheat oven to 175 degrees F. Line baking sheet with parchment paper. Roll out clay to 1/4 inch thick on a silicone mat lightly dusted with cornstarch. Use cookie cutters to cut out shapes. Transfer shapes to the prepared baking sheet. You can use a straw to make a hole at the top of the ornament so you can add ribbon later to hang it. We used a bamboo skewer. Place them in the oven for about an hour, *turning them over halfway through cooking.*

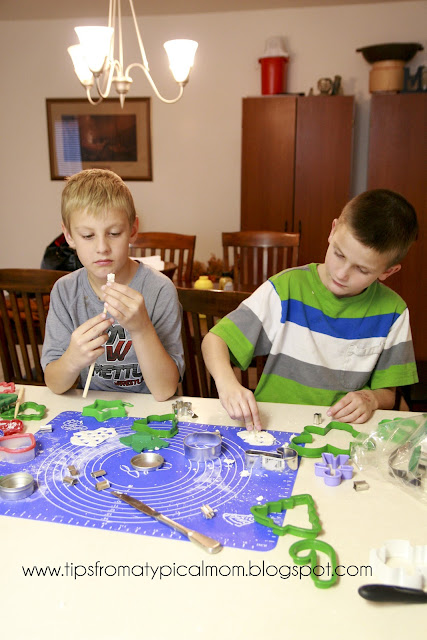
We love using the Wilton Christmas Cookie Cutter Set for these, but you could use this dough for any time of year. We used these little micro cookie cutters for some fun holes and shapes to add dimension to our ornaments.

This is also great for hand prints or foot prints!


Let your kids have fun creating and spending time with each other! Don’t they look excited!? Ha Ha! Boys . . .
Before Baking:


After Baking: (remember you can let these air dry over night if baking them doesn’t work for you)


Have fun painting them if you want! We like to use Acrylic Paint and these paint brushes to decorate our ornaments.

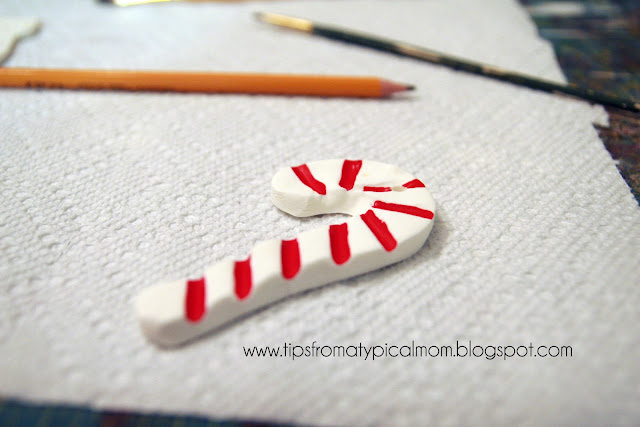
We used a bamboo skewer to indent lines on this candy cane before we baked it. Then it was the perfect guide for our paint!
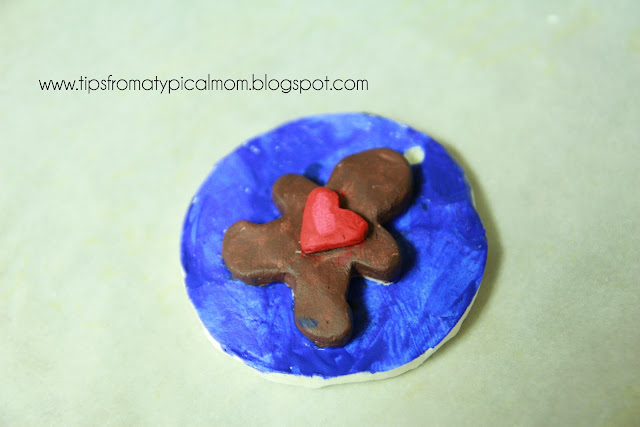
Here is our cute little stacked ornament. My daughter made this all by herself! So creative!
Here is a printable version of the recipe to make your life easier!

Ingredients
- 1/2 cup cornstarch
- 1 cup baking soda
- 3/4 cup water
- cookie cutters
- for fun: embossed rolling pins and craft paint
- optional: food coloring (if you want to make colored dough, add the food coloring to the water before you mix it in.)
Instructions
- In a medium sized pot combine the cornstarch, baking soda, and water. Stir over medium heat. After a couple of minutes, the mixture will begin to thicken. When it looks like smooth, mashed potatoes, remove the pot from the heat. Spoon the ball of dough into a bowl and cover it with a damp cloth or plastic wrap until it's cool. When it's cool, knead it on a smooth surface (I use my silicone mat for this. I use this mat about 3 times a week while baking.) until smooth and silky. Add more cornstarch if it feels too sticky and/or sticks to the surface.
- *You can let the ornaments air dry over night in a warm place or you can bake them.
- To bake them:
- Preheat oven to 175 degrees F. Line baking sheet with parchment paper. Roll out clay to 1/4 inch thick on a silicone mat lightly dusted with cornstarch. Use cookie cutters to cut out shapes. Transfer shapes to the prepared baking sheet. You can use a straw to make a hole at the top of the ornament so you can add ribbon later to hang it. We used a bamboo skewer. Place them in the oven for about an hour, turning them over halfway through cooking.

Need more fun ideas for homemade Christmas ornaments to make with your kids? Here you go!


Great recipe, thank you!
Hi, I made the cornstarch dough this morning and it is not in dough stage and I can still stir it in the pot…anyone have any suggestions? really bummed out about it and wondering if I should just keep adding more cornstarch? Thanks! Juliette
Yes, I’d keep adding it little by little to get the consistency you need.
how many ornaments does this recipe make?
I made 13 ornaments with it
Add the slightest drop of water. Or keep mould it in your hands
what you said sounds like the mistake I made this morning. try to stir in the pot (medium heat) for longer until it gets thicken like mashed potato. I thought mine was done this morning, and it wasn’t dough texture, it was more like wet watery texture yet thick (if that makes sense)
You probably need to add more corn starch if it is still watery.
I used flour instead of cornstarch and the same thing happened I kept adding flour to the dough and it worked great
How did it work with flour??!
It doesn’t work with flour it has to be cornstarch.
We put yours in the Avène and just opened the door and stirred it and turned the heat up just a little it came out looking like mashed potatoes let it cool down. It turned out good
I made it this morning. It goes from liquids to mashed potato state very quickly but took more than 2 minutes to get there.
I’ve been here for 10 minutes and it’s still in a liquid state. I added a few more tablespoons of cornstarch. But it is not turning to mashed potatoes consistency
SO terribly disappointed in this recipe. Tried baking as directed, tried air drying. They cracked. Going back to real salt dough.
Hi Linda, Sometimes these turn out badly for people living in a different elevation as me, or in a more humid or more dry area than I live in. It takes a few tries to get it right for your air.
For baking purposes, what is your elevation?
I’m at 4600 feet.
Mine cracked, too and I live in Texas as well. They were perfect until they neared completely drying and cracked. I watched the cracks get bigger and bigger over hours. So disappointed as it was a lot of effort making the stuff, rolling it out, getting my son the cooperate with giving his hand print. Was going to use for Xmas gifts. Will have to find another recipe. Bummer.
Hi Elise, I just learned a new trick for helping with cracking that you could try. Here is a video where she explains why clay cracks and this technique might help. I know at different elevations and humidity they clay will dry much differently. Start watching at 2 minutes. https://www.youtube.com/watch?v=UbW3tdT3-4A
Also, when you cover it to dry it will take a lot longer to dry. But if it does crack, you can fill those cracks with more clay and smooth it out and let it dry again.
Yeah mine cracked too and I did I twice, disappointed
Hi Adrienne,
I’m sorry your dough cracked. It’s a little finicky when it comes to the humidity in the air.
How long do the Dough ornaments bake?
About an Hour
Wow love this idea. Want to use it. Any idea on what I can add to the recipe to make it break proof if possible
Did you use glue to keep the stacked ornament layers together? Our pieces didn't stick.<br /><br />Also, we had cracking issues. Any advice?
Polymer clay finisher
I didn't have any cracking issues. Maybe add a bit more water? I used hot glue and super glue and both worked well. Thanks for your comments!
Hi! When you say "turning them over halfway through cooking", do you mean that you turned the baking sheet around in the oven (like 180 degrees) or that you turned the actual shapes over on the tray (so back to front)? I hope that makes sense and thank you so much for posting the recipe! Sophie H. x
I flipped them over. But it couldn't hurt to rotate the pan too! Thanks for the question!
When doing a handprint did flipping it over hurt it?
I didn’t flip them over when they were soft. But I’m sure if you are really careful it wouldn’t hurt it.
How long did you bake for?
An hour. But make sure they don’t start browning and turn them after 30 minutes
How long can you keep this dough if you don’t bake it right away (and what is the best way to store it?)? Can this dough be air dried, or does it need to be baked? What kind of paint is best to use on the finished clay?thanks!!
Lara, I am not sure about how long you can keep this dough. Just make sure you store it in an airtight container. I haven’t tried air drying it, I think baking it ensures it doesn’t crack and dries all the way to the center.
I was wondering the same thing about keeping the ‘dough’. I’m wanting to make these for a friend of mine. I put her kiddos on the bus every morning for school. I wanted to make the clay dough tonight and roll it out tomorrow morning so they could make them before I put them on the bus and we will paint them the next morning. I guess it can’t hurt to try.. lol
I’m sure storing it at room temperature covered with plastic wrap will work.
Storing it in a ziplock bag works well. Just make sure to get as much air out of the bag as you can.
LMAO, I started making this and put all the ingredients together and it was all con starch like and I was like WHAT THE HECK?! and then I read the rest of the instructions and found that you are supposed to cook it…. my bad lol. Thank you! I’m using it to make bones for a Halloween costume!
Oh my gosh Katie! That’s funny! What a good idea to make bones for Halloween!
Could I make spherical (e.g., egg-shaped or balls) ornaments from this clay? Or do they have to be flat? Thank you.
I have not tried to make spheres with this dough so I don’t know if it will dry all the way through.
If you want to make 3D objects you could try a center of balled up aluminum foil like is done with sculpting dolls etc although to keep them from flattening you’d need a way to suspend them while baking
I cooked them for and hr and they are still soft and falling apart what should i do
If you live in a really humid place, try adding less water. I didn’t have that problem and I followed the recipe exactly. Sorry!
I baked mine but they puffed up. How do you stop this?
I’m not sure why they puffed up! Mind didn’t change shape at all. We might be at different altitudes and humidity levels. Sorry!
Do you know if i can use this recipe for stepping stones for outside? thank you
I don’t think the dough would hold up to getting wet. But you could test some with a clear outdoor glaze and see if that keeps it from getting soft when wet.
No… even with a waterproof sealant, mine got soggy. So this is NOT a recipe for outdoor stepping stones.
I’ve made stepping stones out of “Quick Crete” that I got from Home Depot, they work out gr8 I used a pie container from the pies at Cost Co, I put our dogs paw prints on them; just keep a big bowl of water near you to rinse the paws off after.
I ended up cooking some hand prints on 200• for an hour and a half and a couple still had soft spots. Was that blue mat something’s that you use to measure thickness of the dough??
No, the blue mat is something I use in place of flour on the counter top to keep it from sticking. If the dough is rolled out too thick you will have to cook it for longer.
Great idea
I love it too thank you
How long do you cook these for? (in total)
An hour. Making sure they don’t brown at all.
Great post! I’m curious what makes this better/different than salt dough? Is it more pliable?
It’s not grainy and doesn’t dry out your hands when you play with it. It dries like plaster, not gritty like salt dough does.
That’s exactly what I was wondering, what the difference is to salt clay. Perhaps you would consider incorporating this answer into your general writeup?
Indigo, Salt clay is really gritty and crumbles when you work with it. This dough is smooth and easy to work with and doesn’t crumble. It also doesn’t irritate skin like salt dough can.
Is it stronger and not as breakable as the salt dough?
I think it’s pretty strong. But it can break if dropped. It dries really smooth like plaster.
How long does the dried dough last?
For years for me, but I live in a dry climate.
We made this last night. It turned out great!!! Thank you. The kids had fun and I even enjoyed playing with the dough. Hopefully we can paint them tonight.
Thanks for sharing.
Great Jenny! I’m glad you had fun together with it!
Do you know how long these last? I would like to incorporate my kids’ footprints into a project and give them as Christmas presents, but I’m not sure how well they would hold up over time. Thanks!
They are just like plaster, so they should last as long as they don’t break or get wet. But you could seal them with a clear varnish to make sure that doesn’t happen.
I make handprint ornaments with my daycare kids each year. I made some with my animals and the are going on 8 years now. I did seal them and they still look amazing
what did you seal them with?
I didn’t seal them.
When pushing the keys into the dough, did you do it before putting it in the oven or midway through?
Looks amazing! Can’t wait to try it!
Before putting it in the oven
can you dry these in a dehydrator? Maybe on a jelly sheet? That could avoid the over browning in the oven… Just an idea.
They won’t dry completely on a jelly sheet and they might crack that way too. I’m not sure about a dehydrator.
I used my dehydrator and the turned out great took alittle less time with mine only down side was the back has the indentions from the rack but alot easier than the oven and no flipping. I just checked them randomly
How long in your dehydrater? What temperature did you set it to?
I love this!! I have featured it on my Top 10 DIY Ornament Roundup on 11/28
Thanks Renee!
I make apple ornaments in the fall with my daycare kids handprints in the middle. I add a bunch of cinnamon after the dough has cooled and they smell amazing. A have one that’s 5 years old and it still looks and smells great.
How long do you leave them in the oven?
An hour or when they are dry, turning over once. Make sure they don’t brown.
What paint did you use???
Acrylic paint.
Cant wait to make this!
What type of paint can be used?
I use acrylic paint.
My ornaments were hard but I could squeeze them between my thumb and finger and they fell apart.. This happened after the next moring after they had been baked. Will they become harder or do they need to be baked longer. Baked them for at least an hour and a little longer. Should I try baking them more?
Yes, I’d try baking them longer. I think when they do that they might have too much water added. You may live in a more humid place than I do.
What type of paint should I use?
I’d use acrylic paint.
I need to make a lot of hand prints for Christmas presents. I need to make 8 (5 year old) prints and 8 (13 month old) prints. Can you tell me how much I will need to make of the dough so I have enough. I wouldn’t mind having too much. Thank you.
I’d make at least a double batch if not 2 and a 1/2.
Great idea! I was going to try salt dough with my kids this Christmas but I think I’ll try this instead. (What caught my eye on Pinterest was the towns on your key ornaments, I’m from Boxford and live in Saudi Arabia now so it was nice to see that lol)
about how many ornaments did you get out of one recipe?
Shoot, I didn’t pay attention to that. I probably got about 20 cookie cutter sized.
I thought this would be a great and simple idea that I could do. I made it just as you said. Consistency was right ( I think!?), the dough rolled out great (1/4 in) Oven temp at 150. I came bake to check on it and the hand print was all cracked! what did I do wrong?
Try adding more water to the clay. Especially if you live in a dry area.
I have made this type of dough (but not this particular recipe) one year and I distinctly remember adding PVA glue to the recipe. Maybe that would help with the cracking?
We made 2 batches of this clay this weekend and had an ornament making “party”. I think it’s definitely good to note that more humid places may need less water (or more cornstarch). Also-need to roll these out on something non-stick if possible. We did it directly on the granite counter top, but it stuck. Also, the dough started “melting” under the hot lights of my kitchen island. This dough is very finicky-we kept it “cool” in the fridge with a wet paper towel over it-beaking off pieces as needed. We found that 1/4″ was too thick-we changed to about 1/8″ and it worked better, as did raising the oven temp to about 225. Craft Oven Bake Clay is done at this temp so we figured it couldn’t hurt. Our 2nd batch-using these changes-came out much better. We used a straw for holes, stamps to write messages and toothpicks to draw designs. We used acrylic paint after baking and also used some Mod Podge to finish them off. Overall-great easy to execute project and the kids had fun too!
Thanks for all your tips. I know this dough can be different for each person because of the area where you live. In dryer places you’ll need more water, in humid places, less water. Thanks!
tried this last night first attempt I broke all of them it happened when I was the flipping them, so then next batch didn’t flip cooked for an hour then let sit over night and they are perfect and super hard!!
We have made three batches so far for Christmas presents as an alternative to our salt dough ornaments. These have been more durable already as my toddler has drop tested a few lol. More curious if they need to be sealed like salt dough needs to be to keep them from absorbing moisture? Would hate to not seal them and family have moldy ornaments next year. Anybody know for sure if they should be or not? I’ve only read to seal if you want them shinny
Should I adjust the temp for high altitude? I live at 5200 ft. It’s dry here too. I wonder if cream of tartar would help the clay keep from becoming too brittle?
I saw this recipe on a different site but it said air dry clay- same recipe though, I double checked. Has anyone tried air drying? Would be easier for me since my oven dial only goes as low as 300 so I’m never sure if the temp is right when I’m baking them or not, I think that’s why they turn out funky for me lol
I’ve never tried to air dry them. Let us know if it works. Thanks!
Hi. My sons and I made these when they were in elementary school in the 70’s. I think the recipe came in a set of cookie cutters I purchased The recipe said to put on wax paper and let them air dry, never mentioned using an oven to dry them. A few years back, they started to look a little “aged”, a little off color. The boys didn’t want them, so I tossed them, but they were perfect, just like the day they were made…except for the slight yellowing. I no longer have the recipe, but I lived in Ohio then and I had no problem with them drying. I recently used a recipe I found on the internet, and I’ve had breaking and crumbling issues and I know it’s probably because I now live in a humid climate, so it’s a process getting the amount of water just right, because of the humidity. But the ingredients are very inexpensive, so I’ll keep trying until I get it right. Hope this info helps some of you out there….If one batch doesn’t do just right, try again. It is truly an awesome medium, and a beautiful pure white, and my lasted over 30 years without breaking.
i let it air dry and most of ours cracked. I am trying to bake mine now but see some of them are cracking in the oven too. No luck here.
I’ve spent a long time trying to get the dough to release from the key without destroying the ornament with no success. I’ve tried dipping the key in corn starch, still no luck. Has anyone else experienced this and got around it? I’ve really wanted to this for me and my husbands first Christmas together…
Did you try non stick spray?
Would replacing the cornstarch with arrowroot powder be ok? Otherwise, I guess a run to the store…:)
I have never tried arrowroot powder Amy so I can not answer that. If it doesn’t behave like cornstarch, then I would say no. Let us know if you try it though.
Probably too late to respond, but I used arrowroot starch and got the same results for the dough as you would with cornstarch (like mashed potatoes). I figured any starch would work but the results might vary. I had to add lots of extra starch and my stuff got quite puffy and cracked, but I wanted to make mini menorahs to hold candles so I made my cutout about 1/2 inch. I am trying again with the cornstarch and less water. I think I didn’t cook the dough long enough. It got fizzy and I think if you don’t let it the baking soda fully react, it makes the dough puff up when you are baking it.
Dough came out fine. Having trouble baking them thou. When I flipped them half way thru then pulled them out after full hour, the bottom that was first the top was not hard like when I flipped them it was soft again. And break very easliy. Followed everything exactly. I dont live in a very humid place. Its cold and wet here in Montana. Not sure if wether affects itor even why it does to begin with. Anyways any advice to get them dry and harden? And not crack or break easily? Thanks.
Try making the dough again with a little less water.
I want to add glitter to the dough before baking. Do you think that would be ok? Or will baking glitter burn? Thanks!
I have no idea if it would burn. Maybe try it in a little bit. Let us know how it turned out!
Can you add cinnamon to it? I know theyll be brown,but theyll smell good
I bet that would be awesome!
I did the recipe and it never baked all the way through and I have cracks. Any suggestions?
Great idea for doing our own ornaments! I love the post!
I made these tonight with my 14-month-old son. I loved the texture of the dough while we were making our shapes. I have been baking them nearly 2 hours now and they still have soft, pliable middles. My oven is on 175 so I’m not sure what the problem is but it could be the moisture from the weather
Great idea with the key imprints! How heavy are they? Would someone say, “Wow! I can’t believe how light they are?”
Hi,
We made these the first of December and had dough left over. I put it in a ziplock bag in the fridge and justo brought it out to make valentines. Dough worked just fine after being the fridge for a couple of months….we love this dough. Thanks for sharing!
Can this dough be made ahead of time?
I have never made it ahead of time, but I bet it would work if you keep it wrapped up tight with plastic wrap.
Is the temperature 175 degrees FARENHEIGHT OR CELIUS? Gas mark 1 is 250 something!
Hi Gracie. It says right there in the recipe F for farenheight. If you can’t use your oven lower than 250, then I’m not sure if that would work. Sorry~!
Very cute! Does it matter what kind of paint you use for the ornaments?
Thanks Tanya. I use acrylic paint. I’m not sure how well any other kind would.
What about making hand/foot prints baking,then painting & then using modge lodge coating/w a bit of glitter in it?
That would work great! Great idea!
We’ve been making this since I was a kid. Just found my mother’s recipe to make with my kids, but I’m lacking corn starch. I was looking to see if I could do a salt dough instead, but reading your comments, I think I’ll just stop by the store and get another box of corn starch.
For making ahead: you can wrap the damp dough well in plastic wrap and refrigerate it for several weeks. I don’t know if it can be frozen.
You can air dry these, as long as your humidity isn’t too high, but be aware that it will take several days. Maybe over a week. Or you can leave them to air dry if they come out of the oven a bit soft still.
Another trick is to turn your oven on low just before bed time, stick the shapes in, and then turn off the oven after the door is closed. Frequently, that’s enough to dry them by morning.
These suckers last forever. Or, at least, Mom still has the ones I made as a kid 30 something years ago. They go on her tree every year.
Hope that helps those who are looking for this year’s Christmas projects with the kids!
Perfect commentary. Answered all the questions. Ours are baking off right now. Here in the Virginia Blue Ridge, I’ll use a little less water and cook the mix a few seconds longer next time.
Please be very careful to ventilate the house when baking. I was so excited to find this recipe but during the baking, I began coughing. The next day I read up on what happens when you heat baking soda – it emits carbon dioxide. Carbon dioxide displaces oxygen, thus the impaired breathing and coughing. I am still trying to recover 2 weeks later! PLEASE BE CAREFUL!
I had a terrible time with this recipe. It was either too crumbly or too sticky when I rolled it out. I couldn’t peel the shapes off the table to place on the baking sheet. After baking, they crumbled as soon as I handed them to my son. Pinterest fail!
Emily, the measurements sound like they weren’t right. And if baking doesn’t work, you can let them air dry in a warm place over night. Try that and see if it works.
I made this. The consistency seemed okay. I was able to make the hand and footprint but after I baked it – both of the fell apart! Suggestions?
Sorry you’re having trouble Patricia. I honestly don’t know why they would be falling apart since mine worked perfectly. You may need to add more water to the mix. Sorry!
As teacher, I’ll try very soon! Thank you for this recipe.
Kiss from France
You’re so welcome Dany. Have a great week!
I made this about a month ago for a special grndma gift from the kids. I just pulled it out of the fridge and its just as it was the day I made it. I kept it in a ziplock bag and forgot about it in the fridge. After letting it sit and get back to room temp it worked great! I did have issues with cracks with the thicker hand print piece. But I realized it was just too thick and big.
I’m so glad to know that it can survive so long in the fridge. Thanks Jule.
This is the second time I’ve tried this dough and it simply doesn’t work. I think it only works from US manufactured ingredients and measurements.
So sorry Sherrie. I don’t know how the ingredients are different. Wish it could work for you.
Don’t measure. It’s a 2:1 ratio of baking soda and corn starch. Be sure to heat with constant stirring until it begins to form a ball. Take it out of the pan, cover, and cool in the fridge for at least 45 minutes. Longer is better. Then spill it out and knead adding more corn starch if sticky. Done.
How Long Do The Ornaments Last?
My ornaments have lasted years. Just make sure you treat them like glass when you store them.
Such a cute idea. Being a real estate agent, I love this idea for a gift for my clients to show my appreciating in choosing me as their agent. Thanks for sharing!
When you paint the ornaments do you have to spray them with some kind of sealer or doesn’t matter?
No need to seal them before painting them.
Do you have to seal them after painting?
I’m excited to try the recipe out for a bunch of ornaments for family members! I was just wondering about how many ornaments you think you could get out of a single batch? Thanks!
It depends on how big the ornaments are. Just add together the ingredients and you’ll see about how many cups it makes.
I would bake anything you make, I air dried two of mine, they are extremely fragile and frail, and easily break apart, also have cracking issues aswell.
Thanks so much for sharing this recipe. My family loved it – few ingredients, so easy and quick to make, and great to handle. Merry Christmas!
I was very disappointed. I had all my daycare kids do handprints. It was a mess, but they were so cute. Baked them and they all cracked. All that work and mess for nothing.
It’s all about the humidity in the air. If you live in a dry place you need to add more water. Other way around for a humid place. Sorry it didn’t work for you. It’s always better to do a test first.
Could you make this doUgh ahead of time and then store in a container for a few hours ? Thanks
Yes it stores nicely in an airtight container.
SO I followed the recipe exactly and mine as incredibly fragile. This does not seem like the right recipe for crafts with 3 year olds.
I love your post! I think I’m going to use this recipe for our annual grandkids christmas party. I think a trial run of it this week is a good idea before they arrive on Monday so I can get it right. It’s very humid here in Western Washington.
A good way to make sure they are 1/4 inch thick and consistent throughout, is to get 1/4 inch slats from your local hardware store like home depot. My sister-in-law did this for her craft business years ago. They were like 1/4″x1″x12″ She used two of them on either side of the dough, then placed the rolling pin on top of the slats and rolled out the dough.
Thanks for your wonderful post!
Great idea Denise!
I was really excited to read this recipe but the ads mad it so hard for the page to load. Hope it is good, but I’m not wasting any more time on this page
Hi, “this sucks” . . . thanks for your reply. I started writing my blog for my children. So they could have a place to find all my recipes and parenting ideas when they become parents. My blog grew and started getting more traffic. I started working harder on my posts, taking better pictures, and writing a lot more than I did before. This is my JOB now. It helps support my family. I work at least 4 hours every day. I buy supplies and products to create posts. This all requires an income. Blogs have ads to compensate themselves for all their hard work to bring you useful content. And to be honest, it was probably the image sizes that made the page slow to load. Not the ads. I need to go in and fix that.
Did you use glue to keep the stacked ornament layers together?
Yes we used hot glue.
I won’t lie… I didn’t bother searching through all of these comments/questions… But I’m curious if you would think a dehydrator would work? I have one that has a thermostat (so many temp settings)… I was thinking that may help prevent breakage by allowing the water to evaporate more slowly? Have any input on my thoughts? Thanks for the recipe! The children and I will have a hoot with this If I don’t get a response I will likely give it a whirl at some point anyway.
That is a great idea Molly, let us know how it works out!
made this 2times and both times it cracked :'(
first time I baked it in the oven, all of them cracked badly
So second time I try airdrying them, and it cracked all the same
Too bad…
Thank you for sharing your recipe! When dry, is the dough porous? I like the smooth look of these ornaments but would like to make ornaments to use as essential oil diffusers so need them to be porous.
No, these ornaments are pretty smooth when dry. But there’s no harm in trying.
If I use this to make jewelleries and keychains , will it last for years , like for a very long time?
Hi Jay,
They probably won’t hold up too well as a keychain, but maybe as jewelry. They are like clay so would break if they fell to a hard ground.
This recipe clearly does not translate or work well. Totally failed for us and I read through all of the comments for advice. Please remove from the internet~
Sorry you’re having trouble with it Josh. Obviously it has worked for many people, including me. So I will not be removing it from the internet. Thanks for your feedback.
You should be submitted for a special extreme patience award.
Ha Ha Diane! Thanks.
Has anyone tried to make diy tiles? I want fish scale tiles but they’re to expensive so I’ve opted toward making them myself. I know tile grade clay needs to be baked so in wondering if this clay would work. The reason I ask is cause idk how durable it’ll be against dishes and glasses hitting the tiles since I’ll be using them for a table top. Sorry if my question seems dumb. Thanks in advance.
Hi Cynthia, I wouldn’t use this recipe for anything other than a fun craft. It’s not durable enough to use for tiles.
this didn’t work for me. I ended up throwing it out. I did everything to a T in the recipe it I still ended up with a very brittle ornament and broke when trying to handle them to paint. I rolled mine so so they were still about a quarter inch thick and took 4 days to completely dry and white. On Day 4 I bake them as instructions. I will pass. such a waste for a person on a tight budget and wanted to make homemade gifts wasted money on cornstarch and baking soda. going to buy real clay
Hi Sara, I’m sorry this recipe didn’t work out for you. I noticed that you said you let them air dry then you baked them? You were supposed to just choose one. Air dry, or bake, not both. That might be why they turned brittle for you.
Can the dough be stored to be used another day or does it have to be used immediately once prepared.
You can keep it in an airtight container for about a week before using it.
Are these ornaments long lasting? How do they hold up years after you make them? Thanks!!
I have had some for about 5 years now. As long as you pack them correctly with padding they should hold up for years!
What would happen if I put my cutouts between absorbent paper towels to dry?
They would probably stick to those!
Hello I made this dough and it turned out great but the ornament I made cracked over night and will eventually break in half. Do you have any tips to keep this from happening
Sorry I just saw this comment. I’m sorry it’s cracking. Unfortunately since the elevation might be different for you and the humidity might be different this dough might not work for everyone. It could need less or more water depending on your environment. I’d test a few different doughs.
Does it make a difference whether you bake or air dry them? Like, are they more hard and permanent if they’ve been baked? This seems important. Thanks!
Hi Mellow, I baked mine, I’ve never air dried them so I’m not sure which is better. I really watched them in the oven though so the edges didn’t start turning brown.
Love this recipe. Sometimes I have trouble getting the dough to let go of the ornament mold. Any advice?
Maybe try a tiny bit of non stick spray on a paper towel and wipe the inside of the mold?
I found this dough to be absurdly difficult to work with. It’s fragile in dough form and very difficult to transfer shapes from work surface to baking pan without deforming your creation. Definitely not better than salt dough, especially for children.
Amazing recipe! I forgot about my dough cooking on the bench.. found it this morning and it’s a little crumbly. Any suggestions? Or should I just start again?